Showing posts with label black. Show all posts

Thursday, March 7, 2013

Inspired


Hi! 

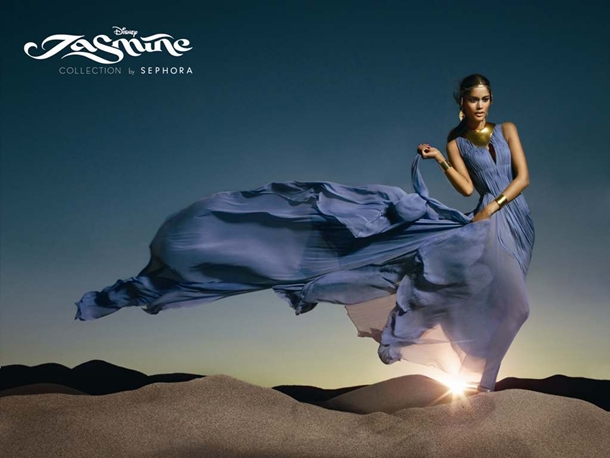
So as the title of this post indicates, this look was "inspired" by the Jasmine collection at Sephora, I haven' seen it yet (it should be available starting this month on the e-shop in France) but this was mostly inspired by the promotional video and some screen captures that I've seen.

The colours mostly used for these looks are black and gold, there are also touches of blue, green, purple and coral. But the overall look is mostly dark.
I wouldn't go to work like this ^^ so this is a "milder" version of it.


Products used:
Face:
The Body Shop Tea Tree Pore Minimiser
Mac Mineralize Charged water moisture gel
The body shop concealer pencil in shade 06

Eyes:
Elf shadow primer
NYX Jumbo Pencils in Milk and Yoghurt
The Coral Shadow from my Wet'n Wild Palette in Walking on Eggshells and the black from my Naked Palette 2
The colour in the inner corner of my eyes is the gold from my Clinique All in One Palette
Clinique Mascara

Lips:
Astor Liquid care in Gorgeous Fuschia

So that's it for now, more coming soon. I will do a look that is darker and more bold, with more colours because I have to admit that I'm not entirely satisfied with this one
See you! Bye!

Sonam

Monday, February 18, 2013

If you can't choose between eyeshadow and liner!

Hi everyone!

Today I'm going to do a tutorial of one of my all time favorite looks. I will only describe the eyemakeup part or this post will be neverending! This look is one that I do when I run out of ideas of looks to do, I call it my "comfort look". It is very easy to do and there's nothing special about it, it's just the look that saves me if I sleep too long and don't have as much time to get ready in the morning or if I'm a bit under the weather and don't want to look like the undead.

So let's get straight to it, first of all, you will need:

-a liner pencil (any brand or colour will do, but I usually use darkish colours because I find that they compliment any eyeshadow colour),

-any powder eyeshadow (I also use shadows that are kind of between powder and cream like the L'Oréal Infaillible ones because they tend to stay put longer),

-a nice bright "highlight shadow" (I use that to highlight the inside corner of my eyes to look more awake and to brighten up the entire look, especially if I'm using a dark eyeshadow, it makes it less dramatic for work or any daytime activities) it doesn't need to be shimmery or anything, just the kind of colour that you would use to highlight your brows for example,

-a dark brown or black liquid eyeliner or eyeliner pen (you will only need this if you want to do a winged liner look, I usually do),

-some mascara, I like to use the ones that have the two sides with the base and the mascara, any brand will also do, what really counts is application.


So let's talk about that now:

-First I usually apply some eyesahdow primer from lid to brow and blend well,

-then I add some powder (foundation powder or loose powder will do the trick),

-after that, I line my eyes with whatever colour I chose I start from the outer corner and bring the line to the inside corner making thinner as I go,

-then add the eyeshadow using a liner brush like this one:, I just pack a little bit of shadow on the tip of the brush and put it onto the line that I just made with the pencil, and add some more until I get the desired effect. Usually I add more shadow on the middle of my lid than on the outside and inside corners, this will create a sort of gradent effect.

-Add the eyeliner at the tip (outside corner) to make the line more defined or to add a wing if you are going for a wing or just add some of the liner to define the tip of the line, this will also add to the gradient effect.

-In the inside corner I add a little bit of white or any light pencil (the one I will use for my waterline), then add the lightest eyeshadow very lightly, it needs to be subtle because I am not wearing shadow on my entire lid, and blend a bit.

-Sometimes, to make the look a bit more dramatic or sophisticated looking I add some bronzing powder in my outer crease and blend, it gives the entire look a more defined effect. If you want you can completely skip this step though.

-Then add some mascara: I always start by putting the primer first, then I comb my lashes out so that they won't clump and also to control in which direction they go, then I add some black or dark brown mascara (I usually go for black though) generously on my top and bottom lashes. I apply the mascara on the top and then the bottom of my lashes (I will explain how I do that in another post). And Voila!

-You can also add some natural looking falsie or even some half lashes too. I always use half lashes anyway because they are easier to apply for me and so they take less time. I also think that it looks more natural for a daytime look.

The look in Blue


 The look in Purple.


I will post some more colours very soon because this is my go-to look these days as I treasure my sleep so much. =)

Although this post was very long, I hope you'll like it and that it will inspire you to do your own version using your favorite colours.

Thanks for reading and see you soon!

(Traduction Française de ce post ici)
Sonam

Tuesday, January 29, 2013

Makeover!

Hi all! 

So as the blog title says this post will be about a makeover, nothing dramatic, but just something different. My model was Aurélie (this is a video presentation of her work that she did recently), a photographer from Lyon that I've worked with on several occasions, first as a makeup artist and also as a model.
But before all that, I'd like to say that I'm really sorry for disappearing for so long (more than two months) but I had a hard time getting inspired and I've been doing pretty much the same makeup look on repeat anytime I need to look presentable (job interviews).
This isn't my best time of the year, but I'll do my best not to go into hibernation again.


Comme l'indique le titre du blog ,ce post sera juste un "makeover", rien de dramatique, mais juste quelque chose de différent. Mon modèle était Aurélie (il s'agit d'une vidéo de présentation de son travail qu'elle a fait récemment), une photographe de Lyon avec qui j'ai travaillé à plusieurs occasions, d'abord en tant que maquilleuse et aussi comme modèle.
Mais avant tout cela, je tiens à dire que je suis vraiment désolée d'avoir disparu pendant si longtemps (plus de deux mois), mais j'étais à court d'inspiration  et j'ai fait à peu près le même maquillage à répétition à chaque fois que j'avais  besoin d'avoir l'air présentable (entretiens d'embauche et autre).
Ce n'est pas mon meilleur moment de l'année, mais je vais faire de mon mieux pour ne pas entrer en hibernation à nouveau.
So lets get to the makeover!
Donc passons au "makeover"!

Here's Aurélie before, fresh faced and smiling =) 
Voici Aurélie avant, sans maquillage et avec le sourire =)

Here I used/ produits utilisés: Clinique's Dramatically Different Moisturizing Gel
Une Beauty cream foundation 
Garnier Pure Active Concealer Roll-on
Yves Saint Laurent Touche Eclat

Then I applied: ELF Mineral Eyelid primer, and Eyeshadows from my Kate Gradical Eyes Palette (from this post) Then I applied some L'Oréal Liner Intense in Black very close to the lash line and quite far to the sides to make her eyes appear slightly larger.

Puis j'ai appliqué: la base pour fard à Paupière ELF Mineral Eyelid Primer, et j'ai utilisé tous les fards de ma palette Kate Gradical Eyes (de ce post). Ensuite j'ai mis du Liner intense de L'Oréal Noir très près des cils et je l'ai aussi étiré un peu plus que d'habitude sur les coins externes pour agrandir le regard.
I forgot to take a picture of it but after this step, I also applied some Benefit They're Real Mascara in black and some purple pencil liner from Clinique on the lower lashline, I added some false lashes (cut in half) and then applied an extra coat of mascara on top of the lashes this time.

J'ai oublié de prendre une photo mais juste après cette étape, j'ai aussi mis un peu de mascara de Benefit They're Real et un peu de crayon liner violet Clinique sur l'interieur de la paupière, j'ai aussi ajouté des faux cils (coupés en deux) et ensuite j'ai mis une autre couche de mascara sur le dessus des cils cette fois-çi.


This is the finished look, you can see the purple eyeliner, which is what I was going for because they really make brown eyes stand out.

Voici le maquillage une fois qu'on a terminé, on voit bien le liner violet, c'est l'effet que je recherchais car le violet fait bien ressortir les yeux marrons.

 On her likps we used some Avène lip balm, a Cargo peach gloss and then topped it off with some L'Oréal gold lip pencil and added another coat of gloss for a shiny yet natural looking finish.

Sur ses lèvres, on a utilisé du baume à lèvres Avène, un gloss couleur pèche de Cargo et aussi un crayon contour des lèvres doré de L'oréal puis une autre couche de gloss pour un fini brillant mais naturel.
I also took a photo with flash to see how it would look but I think I prefer it without. On this photo you can see ho smooth her skin looks with the foundation though. I don't remember using any bronzing powder but we did use some blush from the Kiko Brand in soft Coral. 
Thanks to Aurélie for lending me her face for a few hours, this was a lot of fun!

J'ai aussi pris une photo avec le flash pour voir ce que ça donnerait mais je pense que c'est mieux sans le flash. Mais sur cette photo on peut bien voir à quel point ce fond de teint donne un fini lisse à la peau. Je ne me souviens pas d'avoir utilisé une poudre bronzante mais on a bien utilisé un blush Kiko de la couleur Soft Coral.
Merçi beaucoup à Aurélie de m'avoir prété/confié son visage pendant quelques heures, c'était vraiment amusant!

Thanks for reading.

See you! Bye!

Sonam

Thursday, October 25, 2012

Fascinated by lashes!

source: soshallo

Weirdly enough, my lashes grow straight down, which means that when I apply mascara, if I don't curl them, they just look "meh" or sometimes (depending on the mascara I use) they even look like I don't have any lashes at all. That's where false lashes come in. Actually not really because by curling my lashes I'm quite satisfied with the result, but since I've tried false lashes and seen how much more they add to any look, I can't really go back. I do my makeup without applying false lashes quite often but when I do, I usually pack on the mascara, I don't make them clumpy but I try to still make them stand out. Like so:


It took me a very long time before I learned how to actually apply them properly and also to keep them on, because I used to put them on and then pull them off just before leaving the house thinking "it'll look too fake, and everyone will see they're not mine" or they'll fall off while I'm talking to someone.
But by practicing a lot I managed to get a few techniques to apply them easily, quite fast and make them look realistic too.

Here I'm gonna show you my favorite lashes and less favorite ones and the different techniques I use for different kinds of strip lashes (I don't like the individual ones or the ones that come in little "bunches" of 3 or 4 that you can glue on just because I'm not that good at using them and for me comfort is key so...).

So I'm gonna start by the less favorite ones and try to explain why that is.


Usually when I wear lashes, I like them to blend in with my own lashes, these, for some reason, don't.
I also usually curl the lashes before applying them and these, despite being a bit curled already (not enough IMO) won't budge no matter how long you try, I didn't try heating the lash curler before doing it because I was quite sure they were gonna melt.

This is how they look once applied:


Oh and I also forgot to mention that very visible black band that you can see on my lashline right there.
I don't like that either.

These are my Favorite:


The first reason is the clear band, I really like it as it's not noticeable at all even with neutral looks, you don't need to cover it up with black liner.


They are also very easy to curl which is a big plus for me.
Here's how they look applied.

 I feel like they're even less noticeable without eyeliner actually or with a very thin line of liner.


 Here they're applied cut in half, this is the way I usually use them when I'm in a hurry and also when I'm going for a simple neutral look. 


Here I cut it in half and glued it to the outside part of my lashline.
I also only applied mascara on the roots so that it wouldn't stand out beside my own lashes and voila!

These are my second favorite but they're only second because of the colour of the band otherwise they would be my absolute favorite because I don't know if you can tell, but the band is made of thread actually and that makes it super flexible, which means no more wiggling and twisting the lash band to give it the shape that you want, I just take these out of the box apply the glue and put them on. They also curl as easily as the previous ones, what's not to like?


Here's how they look once applied.


And here's how flexible they are.


You can see the thread band, click for a bigger picture. (works on all the pictures btw)


These are the ones that I like less of those that I do like because the band is quite stiff so it's a bit more work to apply them and also because the band s a bit thick. I guess, being  a newbie at lashes I'm not comfortable with these yet.


I don't have any picture of me wearing them but I guess you can do a similar look to this with them.
The liner will need to be somewhat thick and dark though. I think that they could be great for a photoshoot.


I'd love to get some feather lashes to do some interesting artistic looks like this one. They really inspire me.


I only have one kind of lash glue and it's the Duo Dark Tone one, it's my absolute favourite because the lashes stay put until I decide to remove them, and also because it's a dark colour glue so I don't need to touch it up with liner if I don't feel like it.

 source: Starcosmetics NZ

So this is it, I will also update this post with a video or pictorial of me actually applying my lashes, full strip and half strip so that you can see the entire process. 

Stay tuned and take care until next time!

See you! Bye!

Sonam