Showing posts with label polish. Show all posts

Thursday, March 7, 2013

On my nails right now

Hey!

Just popping in to show what I'm wearing on my nails today:

J'fais juste un p'tit saut pour vous montrer ce que je porte sur mes ongles aujourd'hui:


 As you can see, the colour is the same as in the bottle, and this is just one coat with some Sèche vite top coat on top!

Comme vous pouvez voir, la couleur est la mème que dans le flacon, là j'ai juste mis une couche de vernis et mon top coat Sèche vite!


Sorry for the dry skin >_<', it's still cold here but I don't like to wear my gloves so...

Désolée pour les mains sèches  >_<', il fait encore froid içi mais je n'aime pas porter mes gants alors...

See you! Bye!

Sonam

Tuesday, January 29, 2013

*Glitters and Bollywood style!*

Hi! 
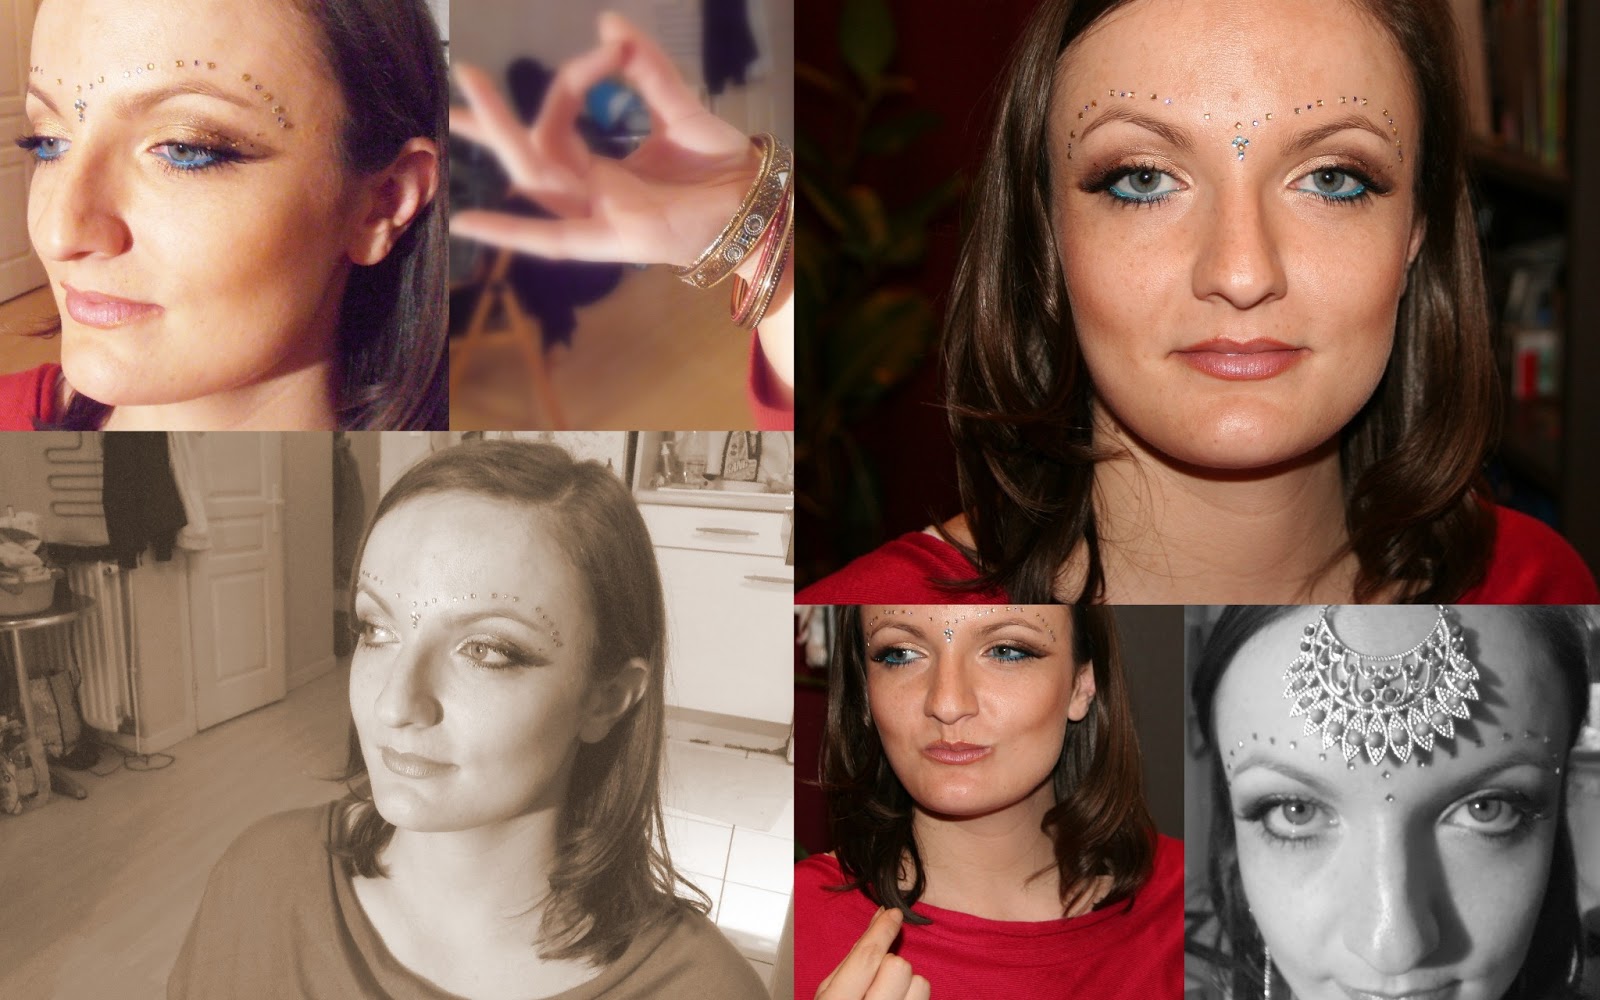
So this isn't really a photoshoot, I asked Cécile if she wanted me to do her makeup and she kindly accepted to leave me in charge of her face for an entire day.
This is what we came up with!

Ceçi n'est pas vraiment une séance photo, en fait j'avais demandé à Cécile si elle voulait que je fasse son maquillage et elle a gentiment accepté de me laisser m'occuper de son visage pendant une journée entière.
Voici ce qu'on a crée finalement!


Making faces! I really like this pic because you can see her cheekbones.
Des grimaces! ^^ J'aime vraiment cette photo car on voit bien le contour de ses pomettes.


Here I applied some strass using some lash glue (Duo brand) to create a Bollywood bridal look and a sort of Bindi in the middle.
Ici, j'ai appliqué des strass en utilisant de la colle pour faux cils (de la marque Duo) pour créer un look de mariée de Bollywood avec une sorte de bindi au milieu.


There's never too much Glitter... =)
Il n'y a jamais trop de paillettes... =)
For the final look, we added some blue eyeliner on the lower lashline, the liner used is a Sephora Waterproof Jumbo pencil in Turquoise.
Pour le look final, on a décidé d'ajouter du liner bleu sur l'interieur de l'oeil, le liner utilisé est un crayon liner JumboSephora Waterproof  Turquoise.
After all the makeup we decided to do some nail-art too.
Après tout le maquillage, on a décidé de faire un peu de nail art aussi.
Cécile got this Ciaté Nail polish for christmas so we decided to try that.
Cécile a reçu ce vernis à ongles Ciaté pour noël donc on a décidé d'éssayer ça.
 This is how the polish looks after two coats, pretty opaque I would say.
Voila de quoi ça a l'air après deux couches de vernis, c'est assez opaque je dirais.

 Then we added the beads, to do so, I added another coat of polish where I wanted the beads to be and then poured the beads on it as fast as possible. It was really funny to do! =)

Ensuite on a ajouté les perles aussi, pour ça, j'ai ajouté une nouvelle couche de vernis là où on voulait que les perles soient puis on a versé les perles dessus aussi rapidement que possible. C'était vraiment amusant à faire! =)


This mani was really pretty and all but the bad news is that it didn't last, the day after, Cécile told me that half of the beads fell off so she had to remove it. =(
I don't know if I did it wrong or something, we did try to put a top coat (Sèche Vite) but it seemed to "wash" the colour off the beads so I didn't go through with it...

If anyone knows how to make the beads stay in place please post your suggestions in the comment box, it will be really appreciated. 

***I will update this post with a full list of the products used to create the makeup looks as soon as possible.***

Cette mani était vraiment jolie et tout, mais la mauvaises nouvelles, c'est que ça n'a pas  tenu, le lendemain, Cécile m'a dit que la moitié des perles étaient tombées et elle a dû retirer ce qui restait. = (
Je ne sais pas si j'ai mal fait ou quelque chose, nous avons essayé de mettre un top coat (Sèche Vite), mais ç avait l'air de  "faire déteindre" la couleur de perles , je ne suis donc pas allée jusqu'au bout ...


Si quelqu'un sait comment faire pour que les perles restent en place s'il vous plaît envoyez vos suggestions dans la boîte de commentaire, elles seront très appréciées.
*** Je mettrai à jour ce post avec une liste complète des produits utilisés  ***


Thanks for visiting!
 See you! Bye!

Sonam

Sunday, October 14, 2012

On my nails now!

Hello there!

So as promised here is my rendition of the Blue Gradient Mani as seen on the Beauty Department
So here's the finished look from the Beauty Department:
and I'm gonna try to do something that is quite similar I would say. So, I followed the Beauty Department's instructions: (except for the one that says not to use a quick drying clear coat as it's the only kind I own):

YOU WILL NEED:  A clear nail polish (don’t use a quick drying clear coat), a white nail polish, a dark rich nail polish color of your choice (WE USED THIS ONE in “INKY”), a metal tray or a piece of cardboard to mix on, acetone or polish remover, a paper towel, paintbrush– the width of the paintbrush must be as wide as or wider than your nail.
  1. Make sure your nails are completely clean and begin by painting your base with a solid white coat. A bright white color is important because it will make your gradient colors stand out! We used THIS ONE.
  2. Next, put five to seven drops of your clear polish on a mixing tray and add 1 drop of polish. Again, it will all depend on the color you’ve picked for your gradient layers… the darker the color, the more drops of clear polish you will need to dilute your original polish color.
  3. Stir this quickly until blended. You’ll want to work fast when mixing because the more air that hits the polish, the quicker it dries.
  4. Decide how many layers you want to create. If it’s 5 (like we did above) imagine your nail divided into those 5 sections. Start with the highest and lightest layer– the lightest should be just below the white as you see in photo number 4. Paint all nails with this color, 4/5 of the way up to the cuticle.
  5. It’s really important to clean your brush completely in between each layer, otherwise you get chunks in the polish.
  6. Now, we make the next shade. Add 5-7 drops of clear polish to 2 drops of the darker polish. Be sure to clean off your tray before each round so that you have a new area to mix.
  7. Next, make your next layer– paint each nail starting 3/5 way up as you see in photo number 7.
  8. Once again, clean off your brush and tray so you can start creating your next color. Mix 5-7 drops of clear polish with 3 drops of your darker color.
  9. Paint this layer on the bottom 2/5 of the nail, closest to the nail tip.
  10. For the last color, I just used the dark polish alone with zero drops of clear. Remember to use your paintbrush to apply so that you get the same line.
  11. By now, you are a layering expert! For your final color, paint each nail starting 1/5 of the way up.
  12. Last but not least, clean around the cuticle using another paintbrush and some nail polish remover.


So these are the products I used:
Sèche Vite Base Coat, Sèche Vite Top Coat, Sinful Colours nail polish in Love Nails 801, a little transparent container to pour the polishes on and to mix them.


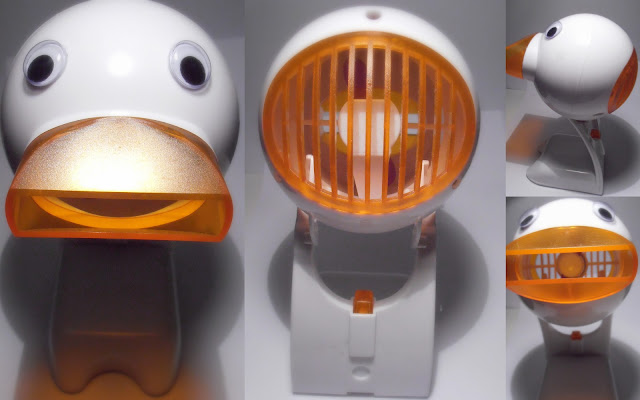
I also used this little guy here, it's a nail drying fan and works very well =) I got it from Ebay and love it because I hate waiting around for my polish to dry.


And I decided to use this brush to apply the polish rather than the one on the first picture because it looked too small.


I decided to use my Sèche Base as a first coat because it's quite similar to white polish but looks better on my skintone. Then I poured some of the Sinful Colour Polish out and poured some clear polish too.


 Then I applied my first coat of coloured polish, I didn't mix the clear and coloured polish because the clear one being Sèche Vite,I knew it would dry out on me before I finished one hand. I just tapped the brush on both polishes picking up more of the clear than the coloured one.

(click for a bigger picture)

After that, I kept doing the same thing but picking up less clear and more coloured polish gradually until I had enough layers, then I applied a last coat of clear polish on top of the entire nails.

I hope you like my version of the gradient mani and that I inspired you to try it too. If you do post the pictures to my facebook page, I would love to see them. =)

See you! Bye!
Sonam