Showing posts with label L'oréal. Show all posts

Thursday, March 7, 2013

On my nails right now

Hey!

Just popping in to show what I'm wearing on my nails today:

J'fais juste un p'tit saut pour vous montrer ce que je porte sur mes ongles aujourd'hui:


 As you can see, the colour is the same as in the bottle, and this is just one coat with some Sèche vite top coat on top!

Comme vous pouvez voir, la couleur est la mème que dans le flacon, là j'ai juste mis une couche de vernis et mon top coat Sèche vite!


Sorry for the dry skin >_<', it's still cold here but I don't like to wear my gloves so...

Désolée pour les mains sèches  >_<', il fait encore froid içi mais je n'aime pas porter mes gants alors...

See you! Bye!

Sonam

Monday, February 18, 2013

If you can't choose between eyeshadow and liner!

Hi everyone!

Today I'm going to do a tutorial of one of my all time favorite looks. I will only describe the eyemakeup part or this post will be neverending! This look is one that I do when I run out of ideas of looks to do, I call it my "comfort look". It is very easy to do and there's nothing special about it, it's just the look that saves me if I sleep too long and don't have as much time to get ready in the morning or if I'm a bit under the weather and don't want to look like the undead.

So let's get straight to it, first of all, you will need:

-a liner pencil (any brand or colour will do, but I usually use darkish colours because I find that they compliment any eyeshadow colour),

-any powder eyeshadow (I also use shadows that are kind of between powder and cream like the L'Oréal Infaillible ones because they tend to stay put longer),

-a nice bright "highlight shadow" (I use that to highlight the inside corner of my eyes to look more awake and to brighten up the entire look, especially if I'm using a dark eyeshadow, it makes it less dramatic for work or any daytime activities) it doesn't need to be shimmery or anything, just the kind of colour that you would use to highlight your brows for example,

-a dark brown or black liquid eyeliner or eyeliner pen (you will only need this if you want to do a winged liner look, I usually do),

-some mascara, I like to use the ones that have the two sides with the base and the mascara, any brand will also do, what really counts is application.


So let's talk about that now:

-First I usually apply some eyesahdow primer from lid to brow and blend well,

-then I add some powder (foundation powder or loose powder will do the trick),

-after that, I line my eyes with whatever colour I chose I start from the outer corner and bring the line to the inside corner making thinner as I go,

-then add the eyeshadow using a liner brush like this one:, I just pack a little bit of shadow on the tip of the brush and put it onto the line that I just made with the pencil, and add some more until I get the desired effect. Usually I add more shadow on the middle of my lid than on the outside and inside corners, this will create a sort of gradent effect.

-Add the eyeliner at the tip (outside corner) to make the line more defined or to add a wing if you are going for a wing or just add some of the liner to define the tip of the line, this will also add to the gradient effect.

-In the inside corner I add a little bit of white or any light pencil (the one I will use for my waterline), then add the lightest eyeshadow very lightly, it needs to be subtle because I am not wearing shadow on my entire lid, and blend a bit.

-Sometimes, to make the look a bit more dramatic or sophisticated looking I add some bronzing powder in my outer crease and blend, it gives the entire look a more defined effect. If you want you can completely skip this step though.

-Then add some mascara: I always start by putting the primer first, then I comb my lashes out so that they won't clump and also to control in which direction they go, then I add some black or dark brown mascara (I usually go for black though) generously on my top and bottom lashes. I apply the mascara on the top and then the bottom of my lashes (I will explain how I do that in another post). And Voila!

-You can also add some natural looking falsie or even some half lashes too. I always use half lashes anyway because they are easier to apply for me and so they take less time. I also think that it looks more natural for a daytime look.

The look in Blue


 The look in Purple.


I will post some more colours very soon because this is my go-to look these days as I treasure my sleep so much. =)

Although this post was very long, I hope you'll like it and that it will inspire you to do your own version using your favorite colours.

Thanks for reading and see you soon!

(Traduction Française de ce post ici)
Sonam

Si vous n'arrivez pas à choisir entre le liner et le fard à paupières!


Salut tout le monde!

Aujourd'hui, je vais faire un tutoriel d'un de mes looks favoris de tous les temps. Je ne vais décrire que la partie pour les yeux ou ce poste sera interminable! Ce look est celui que je fais quand je suis à court d'idées. Il est très facile à faire et il n'y a rien de très particulier, c'est juste le look qui me sauve si je dors trop longtemps et que je n'ai pas autant de temps que d'habitude pour me préparer le matin ou si je suis un peu malade et ne veux pas ressembler à un morts-vivant.^^

Donc nous allons aller droit au but, tout d'abord, ce dont vous aurez besoin:

-un crayon eyeliner (n'importe quelle marque ou couleur fera l'affaire, mais j'ai l'habitude d'utiliser des couleurs sombres parce que je trouve qu'elles complimentent n'importe quelle couleur de fard à paupières),

-une ombre à paupières en poudre (j'ai aussi utiliser les ombres qui sont un peu entre la poudre et la crème comme les Infaillible de L'Oréal car elles ont tendance à tenir plus longtemps),

-un joli fard à paupières neutre de type "highlight" (je l'utiliser pour mettre en évidence le coin intérieur de mes yeux pour avoir l'air un peu plus éveillé et pour égayer le regard entier, surtout si j'utilise un fard à paupières foncé, elle rend le tout un peu moins dramatique pour le travail ou les activités de la journée), il n'a pas besoin d'être brillant ou de contenir des paillettes ou quoi que ce soit, juste le genre de couleur que vous souhaiteriez utiliser pour mettre en valeur vos sourcils par exemple,

-un liner brun foncé ou noir eye-liner liquide ou eye-liner feutre (vous en aurez seulement besoin si vous voulez faire un oeil un peu plus allongé, j'ai l'habitude de le faire),

-du mascara, j'utilise ceux qui ont les deux côtés: la base et le mascara, n'importe quelle marque fera l'affaire aussi, ce qui compte vraiment, c'est la manière de l'appliquer de plus vous pouvez utiliser nimporte quelle base avec un mascara d'une toute autre marque par exemple.


Donc, nous allons parler de l'application maintenant:

-Je commence en principe par appliquer une base pour fard à paupières de la paupière au dessous des sourcils et je tapote pour estomper,

-Puis j'ajoute un peu de poudre (poudre pour le teint ou une poudre libre),

-Après ça, j'applique le crayon de la couleur que j'ai choisie en partant du coin externe et en amenant la ligne vers le coin interne en éssayant de rendre le trait de moins en moins épais,

-Puis il faut ajouterle fard à paupières à l'aide d'un pinceau liner biseauté comme celui-ci:(voir la photo), j'attrape un peu de fard sur la pointe du pinceau et je le pose sur la ligne que je viens de faire avec le crayon, et j'en ajoute un peu plus au fur et à mesure jusqu'à ce que j'obtienne l'effet désiré. D'habitude j'ajoute un peu plus de fard à paupières au milieu que sur les coins externes et internes,ça permet de créer une sorte d'effet dégradé.

-Ajouter l'eye-liner à la pointe (angle extérieur) pour rendre la ligne plus défini ou ajouter un peu de longueur si vous voulez, celà va aussi ajouter à l'éffet de dégradé puisqu'on utilise une couleur différente.

-Dans le coin intérieur j'ajoute un peu de blanc ou de tout crayon un peu lumineux (par exemple le Jumbo pencil de Nyx couleur Yogurt), puis ajouter le  fard à paupières neutre très légèrement, il doit être subtil car je ne porte pas d'ombre sur le reste de ma paupière , et estomper un peu.

-Parfois, pour rendre le look un peu plus dramatique ou sophistiqué j'ajoute un peu de poudre bronzante dans le creux externe de l'oeil et j'estompe,ça ajoute un peu de définition. Cette étape est facultative.

-Puis ajouter un peu de mascara: Je commence toujours par mettre la base blanche,puis je peigne mes cils de telle sorte qu'ils ne seront pas collés les uns aux autres et aussi pour contrôler dans quelle direction ils vont, ensuite j'ajoute un peu de mascara noir ou brun foncé (j'ai l'habitude d'utiliser du noir en général) généreusement sur mon cils supérieurs et inférieurs. J'appliquer le mascara sur le dessus et ensuite le dessous de mes cils (je vais vous expliquer comment je fais ça dans un autre post). Et Voila!

Vous pouvez également ajouter quelques faux cils à l'aspect naturel ou même la moitié d'une paire de cils (je les coupe en deux). J'utilise toujours la moitié de toute façon parce que c'est plus facile à appliquer pour moi et parce que ça me prend donc moins de temps. Je pense aussi que c'est plus naturel pour un maquillage de jour.
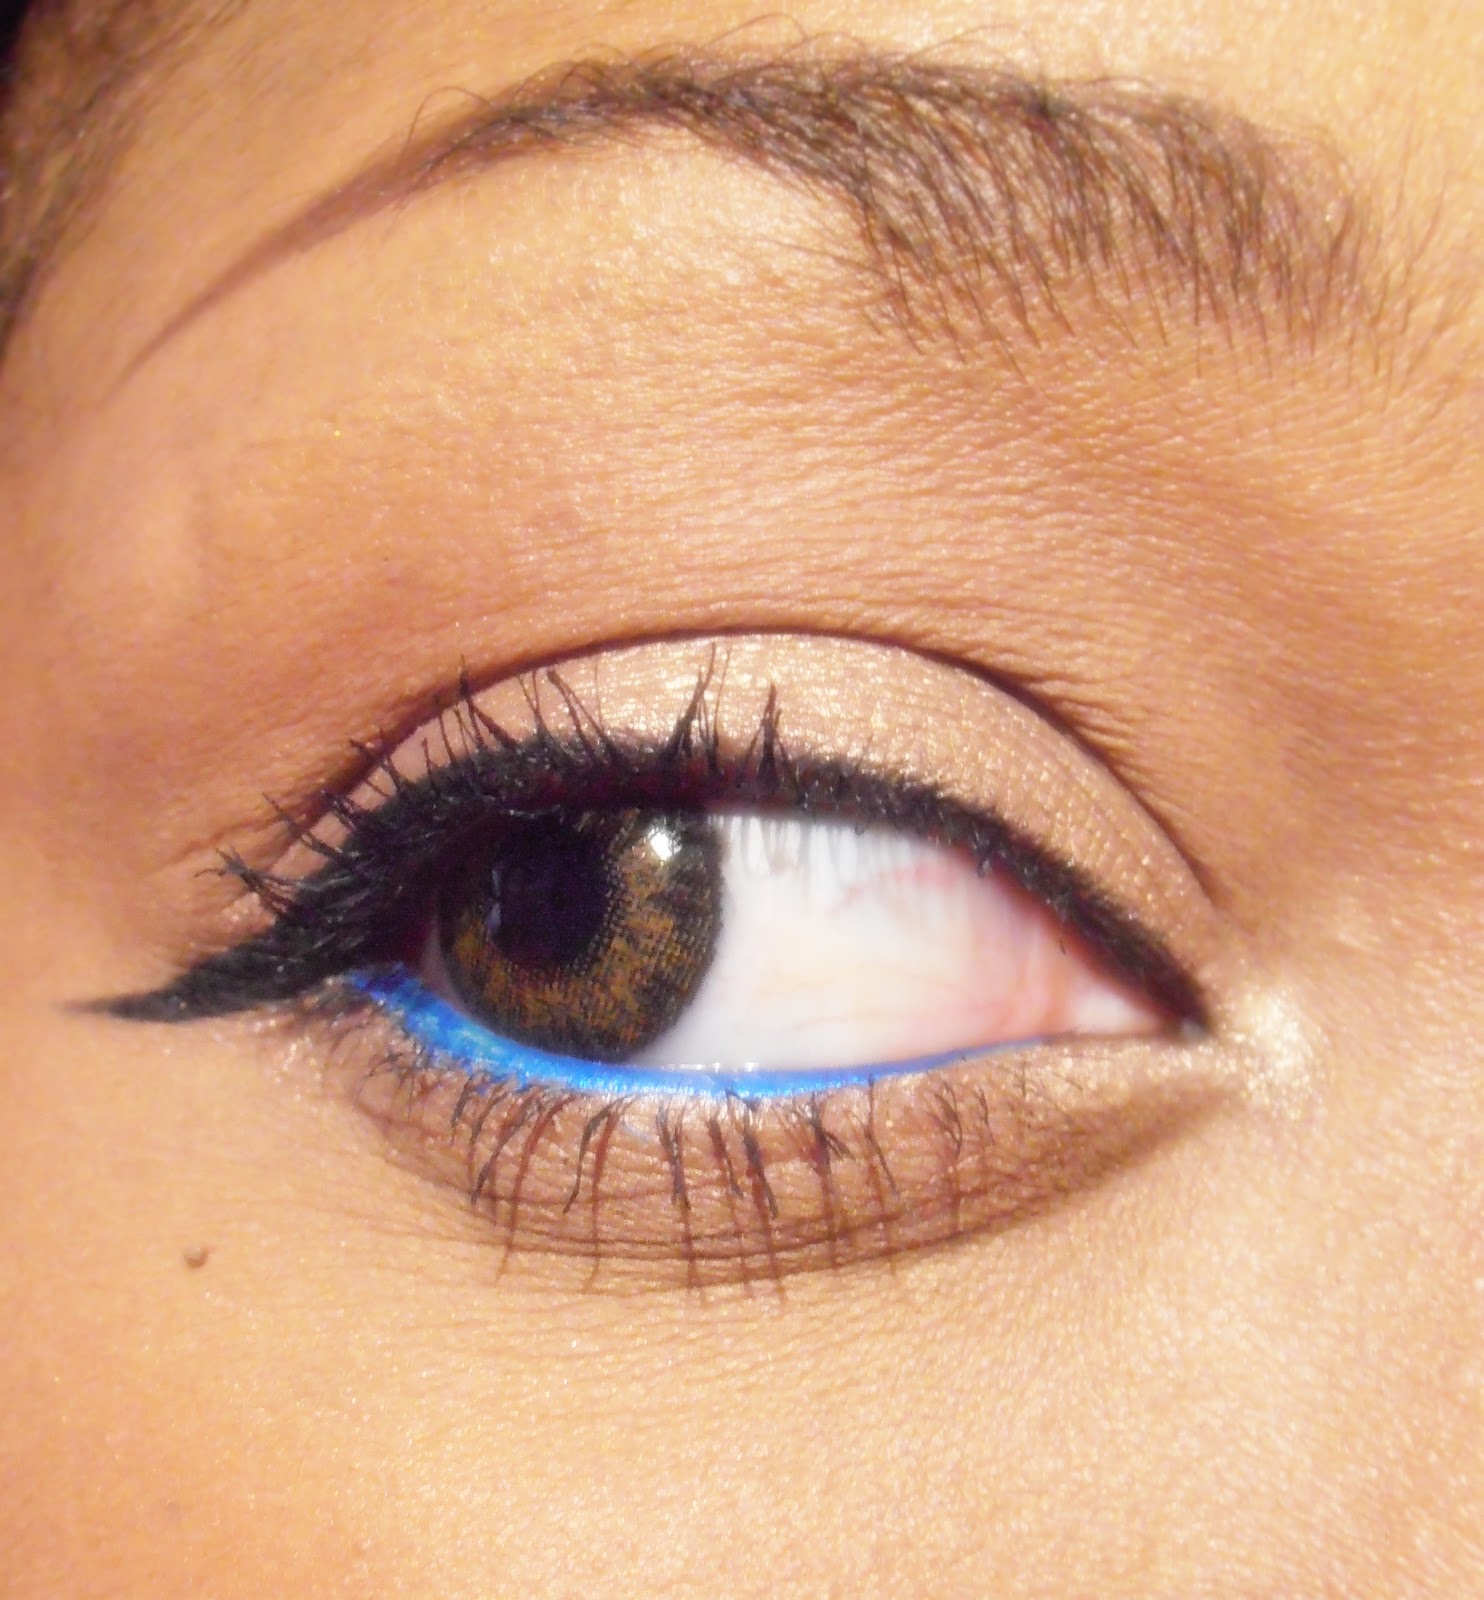

La version Bleue


La version Violette


Je vais poster quelques autres couleurs très bientôt parce que c'est ce que je fais pratiquement tous les jours pour pouvoir dormir plus. =)

J'èspère que ce post, bien que très long, vous aura plu et qu'il vous inspirera à faire votre propre version en utilisant vos couleurs préférées.

Merci d'avoir lù et à bientôt!

(English translation of this post here)
Sonam

Tuesday, October 2, 2012

Looks and looks and more looks (yes, I have a hard time comming up with titles ^^)

Hi again! 
I hope you are all keeping well and that you started off your week on an optimistic note, it always helps.
So today I'm gonna post a few makeup looks that I did during my absence and that I didn't post, I have a lot of catching up to do so I'm working on it.

I haven't been doing anything extraordinarily bold or out of the ordinary, just trying to switch it up a bit and keep it interesting.
I hope you'll like it.


Products used:
The Body Shop Tea Tree Pore Minimiser
Mac Mineralize Charged water moisture gel
The body shop concealer pencil in shade 06 
the Palette I got from my international Swap with Jeanette (clic clic to see what I got)
my Kiko Gel liner in Black
and Kiko Cosmetics waterproof eyeliner in Blue (it stayed there until I removed it with the Sephora Waterproof eye makeup remover)!!!
And I'm wearing Maybelline Volum' Express Falsies in Black (whatever, I prefer They're Real)


Products used:
As usual these days:
On my face:The Body Shop Tea Tree Pore Minimiser
Mac Mineralize Charged water moisture gel
The body shop concealer pencil in shade 06
On my eyes I used ELF shadow Primer
on the crease I have something that is not a shadow but I love this colour for this, it's the Urban Decay Baked Bronzer in shade Toasted (this was given to me by Aurélie my photographer friend and I've been in love with it ever since).
on my inner lid I have Mac Bare Study paint pot thinly applied
and over it I put some pigments from the mac Aloha crushed Metallic Pigments in Lantern Light
In the corner I just left the Paint pot colour only for that gradient effect

in the outer corner I applied Maybelline colour tattoo in purple and added some purple shadow from the Frontcover palette in Ocean, then I lined the outer corner of my eyes with a purple Shadow pencil that I got as a gift from an Ebay seller that I regularly buy from, I'll write a post and post swatches of the pencils they're quite vibrant and longlasting too. They look like this: 
My mascara is Clinique volumising mascara in black, I love the fact that it doesn't dry up and get your lashes stiff. I even curled them wearing this.


In this picture I'm just wearing some Sephora Mattifying powder in shade D35,
A dark brown Miss Helen Brow pencil
Sephora Dark Blue liquid Eyeliner (I put some on my lashes too, that's what happens when I curl them before applying eyeliner)
And Sephora chubby stick Watterproof eyeliner in Turquoise on my bottom lashline

 So that's it for now, I will post about these eyeliners in detail with swatches and show you what I bought when I got these, and where too... 


Until next time, See you, Bye!

Sonam