Hi!
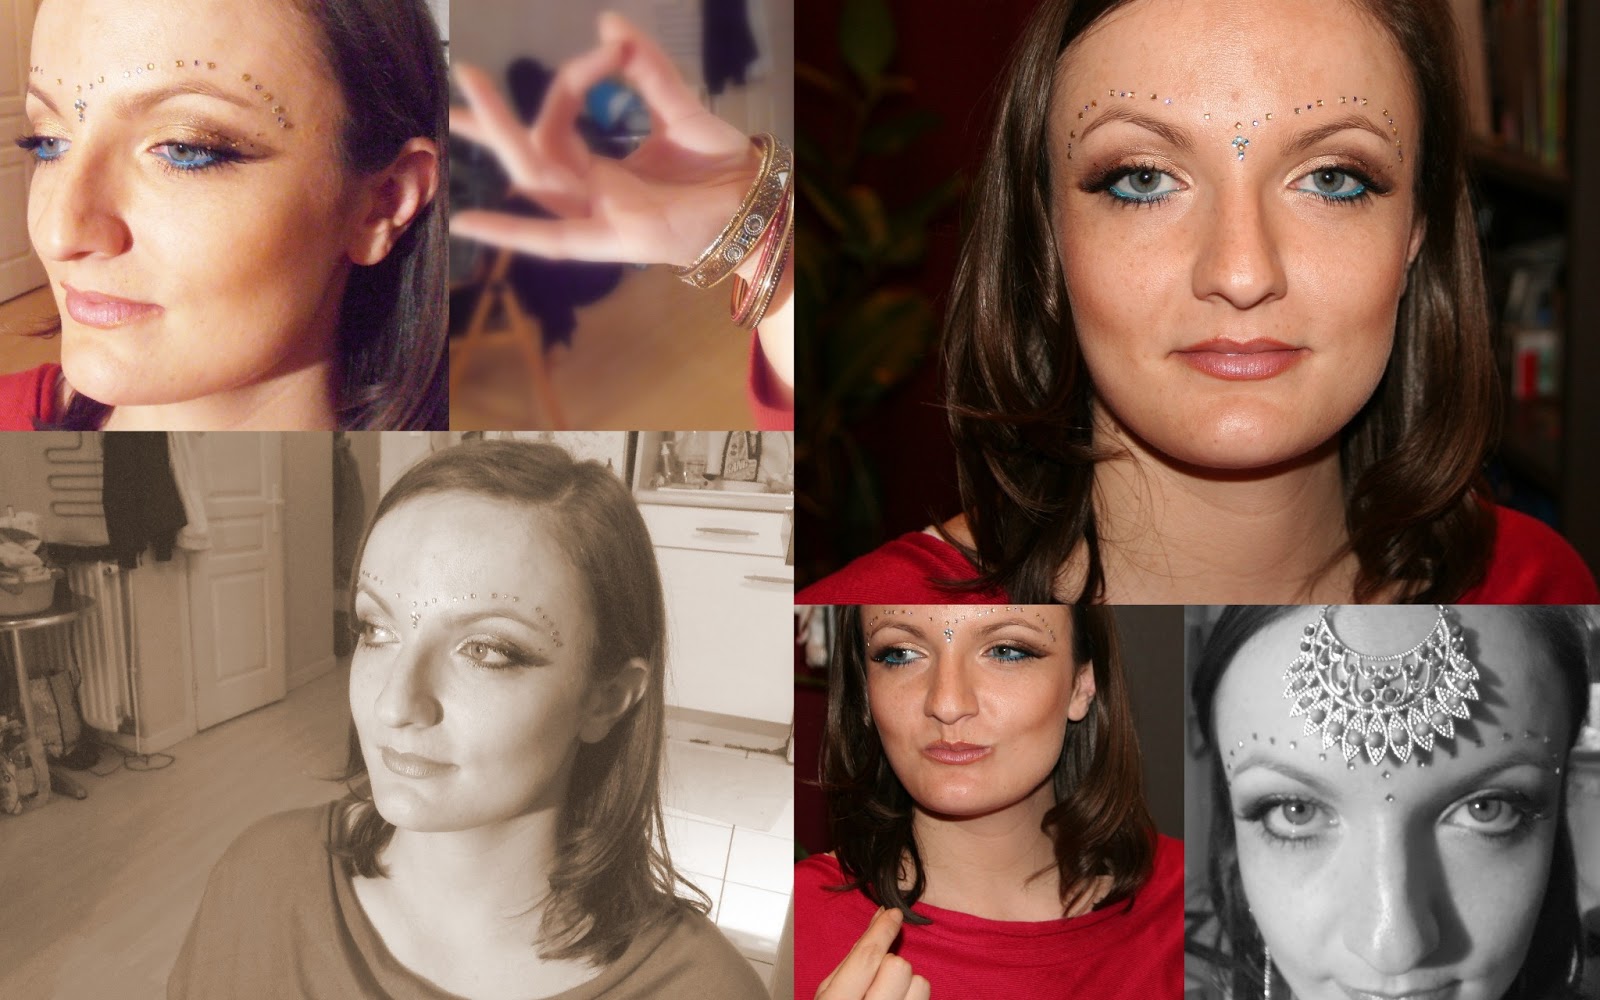
So this isn't really a photoshoot, I asked Cécile if she wanted me to do her makeup and she kindly accepted to leave me in charge of her face for an entire day.
This is what we came up with!
Ceçi n'est pas vraiment une séance photo, en fait j'avais demandé à Cécile si elle voulait que je fasse son maquillage et elle a gentiment accepté de me laisser m'occuper de son visage pendant une journée entière.
Voici ce qu'on a crée finalement!

Making faces! I really like this pic because you can see her cheekbones.
Des grimaces! ^^ J'aime vraiment cette photo car on voit bien le contour de ses pomettes.
Des grimaces! ^^ J'aime vraiment cette photo car on voit bien le contour de ses pomettes.
Here I applied some strass using some lash glue (Duo brand) to create a Bollywood bridal look and a sort of Bindi in the middle.
Ici, j'ai appliqué des strass en utilisant de la colle pour faux cils (de la marque Duo) pour créer un look de mariée de Bollywood avec une sorte de bindi au milieu.
Ici, j'ai appliqué des strass en utilisant de la colle pour faux cils (de la marque Duo) pour créer un look de mariée de Bollywood avec une sorte de bindi au milieu.
There's never too much Glitter... =)
Il n'y a jamais trop de paillettes... =)
Il n'y a jamais trop de paillettes... =)
For the final look, we added some blue eyeliner on the lower lashline, the liner used is a Sephora Waterproof Jumbo pencil in Turquoise.
Pour le look final, on a décidé d'ajouter du liner bleu sur l'interieur de l'oeil, le liner utilisé est un crayon liner JumboSephora Waterproof Turquoise.
Pour le look final, on a décidé d'ajouter du liner bleu sur l'interieur de l'oeil, le liner utilisé est un crayon liner JumboSephora Waterproof Turquoise.

After all the makeup we decided to do some nail-art too.
Après tout le maquillage, on a décidé de faire un peu de nail art aussi.
Cécile got this Ciaté Nail polish for christmas so we decided to try that.
Cécile a reçu ce vernis à ongles Ciaté pour noël donc on a décidé d'éssayer ça.
Cécile a reçu ce vernis à ongles Ciaté pour noël donc on a décidé d'éssayer ça.
This is how the polish looks after two coats, pretty opaque I would say.
Voila de quoi ça a l'air après deux couches de vernis, c'est assez opaque je dirais.
Voila de quoi ça a l'air après deux couches de vernis, c'est assez opaque je dirais.
Then we added the beads, to do so, I added another coat of polish where I wanted the beads to be and then poured the beads on it as fast as possible. It was really funny to do! =)
Ensuite on a ajouté les perles aussi, pour ça, j'ai ajouté une nouvelle couche de vernis là où on voulait que les perles soient puis on a versé les perles dessus aussi rapidement que possible. C'était vraiment amusant à faire! =)
Ensuite on a ajouté les perles aussi, pour ça, j'ai ajouté une nouvelle couche de vernis là où on voulait que les perles soient puis on a versé les perles dessus aussi rapidement que possible. C'était vraiment amusant à faire! =)
This mani was really pretty and all but the bad news is that it didn't last, the day after, Cécile told me that half of the beads fell off so she had to remove it. =(
I don't know if I did it wrong or something, we did try to put a top coat (Sèche Vite) but it seemed to "wash" the colour off the beads so I didn't go through with it...
If anyone knows how to make the beads stay in place please post your suggestions in the comment box, it will be really appreciated.
***I will update this post with a full list of the products used to create the makeup looks as soon as possible.***
Cette mani était vraiment jolie et tout, mais la mauvaises nouvelles, c'est que ça n'a pas tenu, le lendemain, Cécile m'a dit que la moitié des perles étaient tombées et elle a dû retirer ce qui restait. = (
Je ne sais pas si j'ai mal fait ou quelque chose, nous avons essayé de mettre un top coat (Sèche Vite), mais ç avait l'air de "faire déteindre" la couleur de perles , je ne suis donc pas allée jusqu'au bout ...
Si quelqu'un sait comment faire pour que les perles restent en place s'il vous plaît envoyez vos suggestions dans la boîte de commentaire, elles seront très appréciées.
*** Je mettrai à jour ce post avec une liste complète des produits utilisés ***
Thanks for visiting!
See you! Bye!
Sonam


